

こんにちは、ムネトです。

Shopifyでアプリを使わずに特定の会員のみがアクセスできるページを作成できないかな?
といった疑問に、お答えします。
結論から言うと、アプリなしで特定会員専用ページは作れます。
本記事では、アプリなしで特定会員のみがアクセスできるページの作成方法を詳しく解説していきます。
特定会員のみが閲覧できるページは前提条件として、「アカウント(会員)登録をされていること」です。
今回使うShopifyテーマは、Dawnです。
実現したいこと
- アカウント(会員)登録は任意
- 非会員でもストアの一部にアクセスできる
- 特定会員のみがアクセスできるコレクションページと商品ページを作成
- 非会員と会員が特定会員専用ページにアクセスしようとした場合、別ページにジャンプする
・特定ページを閲覧するにはアカウント登録とは別に特定の顧客タグを付与する必要がある
・特定会員にタグを付与する方法は、本記事ではストア側で手動で追加
特定会員を作成
お客様アカウントの設定
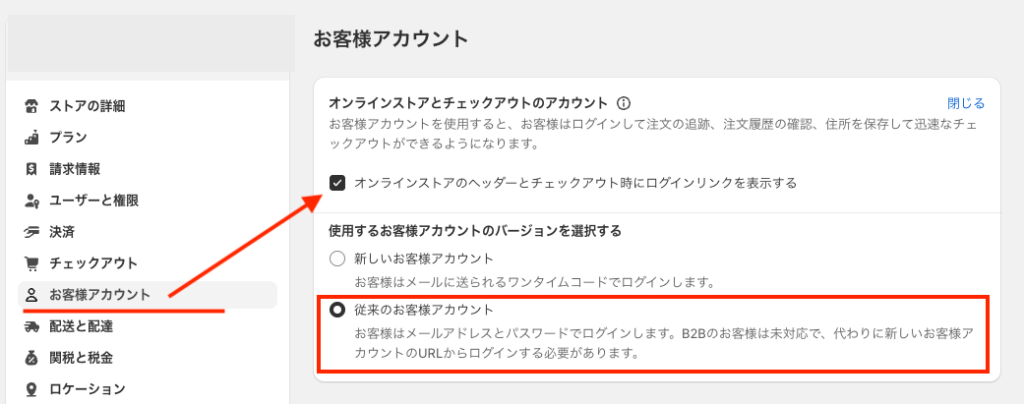
管理画面の設定からの「お客様アカウント」へ移動し、『オンラインストアとチェックアウトのアカウント』にチェックします。チェックすることでストアにログインするためのリンクが表示されます。
アカウントは『従来のお客様アカウント』にします。
顧客タグの設定
顧客管理画面から任意の顧客にタグを付与していきます。
特定会員を設定したいので、本記事では特定会員用の顧客タグを手動で付与します。
『members_0327』というタグを付与します。

顧客タグを自動で付与する
どういう条件で特定会員を作成するかを考える必要があります。
例として、商品を購入していただいたお客様に顧客タグを付与する方法です。
自動でタグを付与するためにはどういう条件で付与するか検討し、「Shopify Flow」などを使用すると便利です。
Flowの設定方法については別で記事にしたいと思います。
会員登録をしたら自動で顧客にタグを付与する設定はコチラをどうぞ

もし設定が難しいと感じたらご相談ください。
特定会員のみアクセスできる商品ページの作成

特定会員のみアクセスできる商品ページのテンプレートを作っていきます。
Templatesの作成
コードの編集>Templates>新しいtemplateを追加する
『product.members.json』という名前にします。
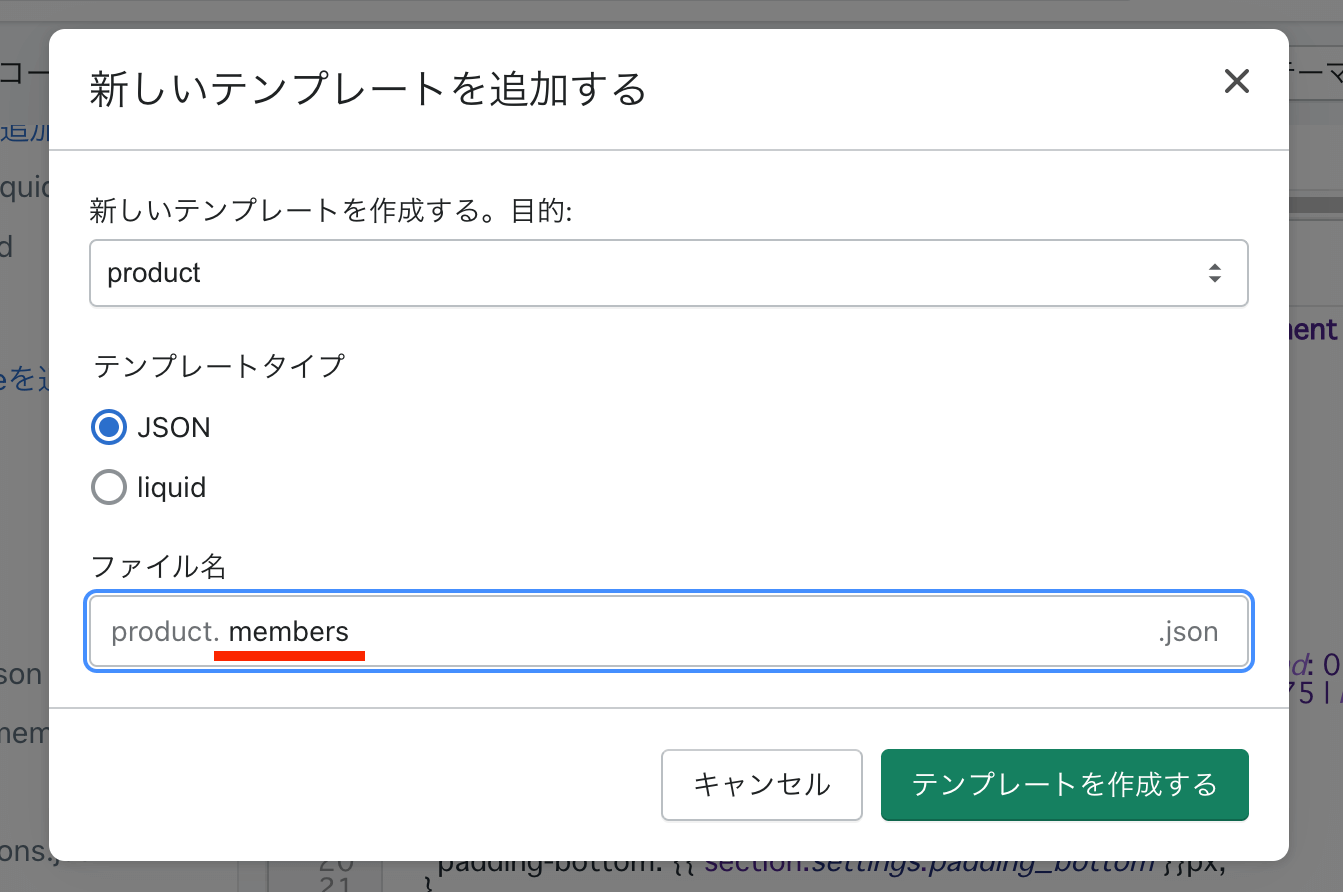
『product.members.json』の中身は、product.json(省略)からコピペしてください。
Sectionsの作成
特定会員のみに表示するセクションファイルを作成
コードの編集>Sections>新しいsectionを追加する
『members-main-product』という名前にします。
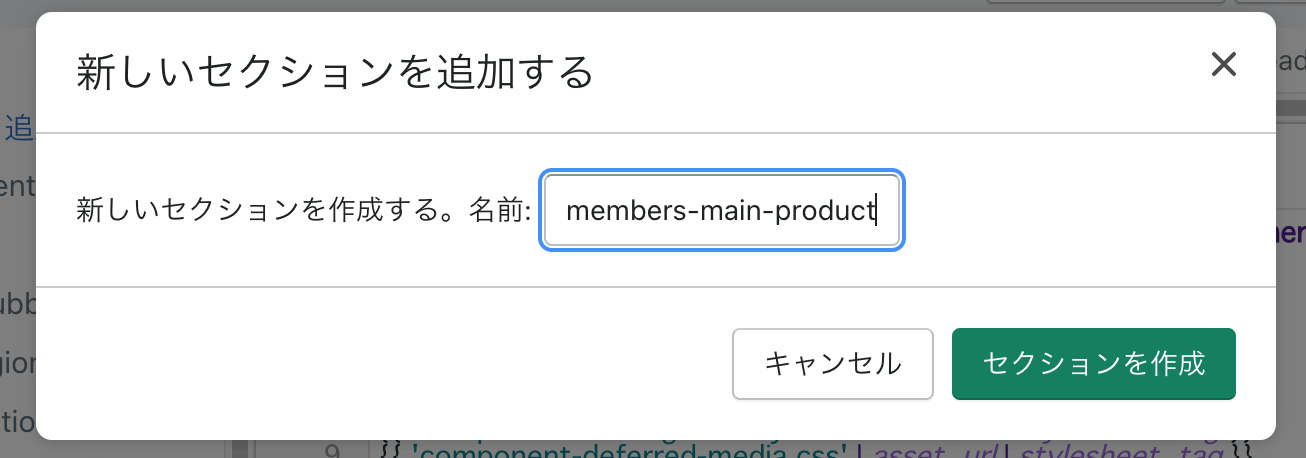
『members-main-product』の中身は、Sectionsにある「main-product.liquid」からすべてのコードをコピペしてください。
新しいセクションの作成は必須ではありません。
Q.なぜ新しいセクションを作るのか?
A.特定会員用に商品ページをカスタマイズする場合に使います。
『product.members.json』のコードの変更
先程作った『product.members.json』にあるセクションファイルの読み込み先を変更します。
4行目あたりにある”type”を置き換えます。
"type": "members-main-product",ここは元々『main-product』というliquidを読み込むようになっていますが、
それを先程のSectionsでつくった『members-main-product』に変更しました。
『product.members.json』のコードは変更せず、そのままでOK
特定会員用の商品テンプレートを変更する
こんどは特定会員のみがアクセスできる商品ページを作っていきます。
商品管理から特定会員専用の商品を追加し、テンプレートを『members』に切り替えます。
「特定会員」という商品タグを作っておきます。
このタグを特定会員用のコレクションで表示するために使用します。このあとコレクション作成で設定します。
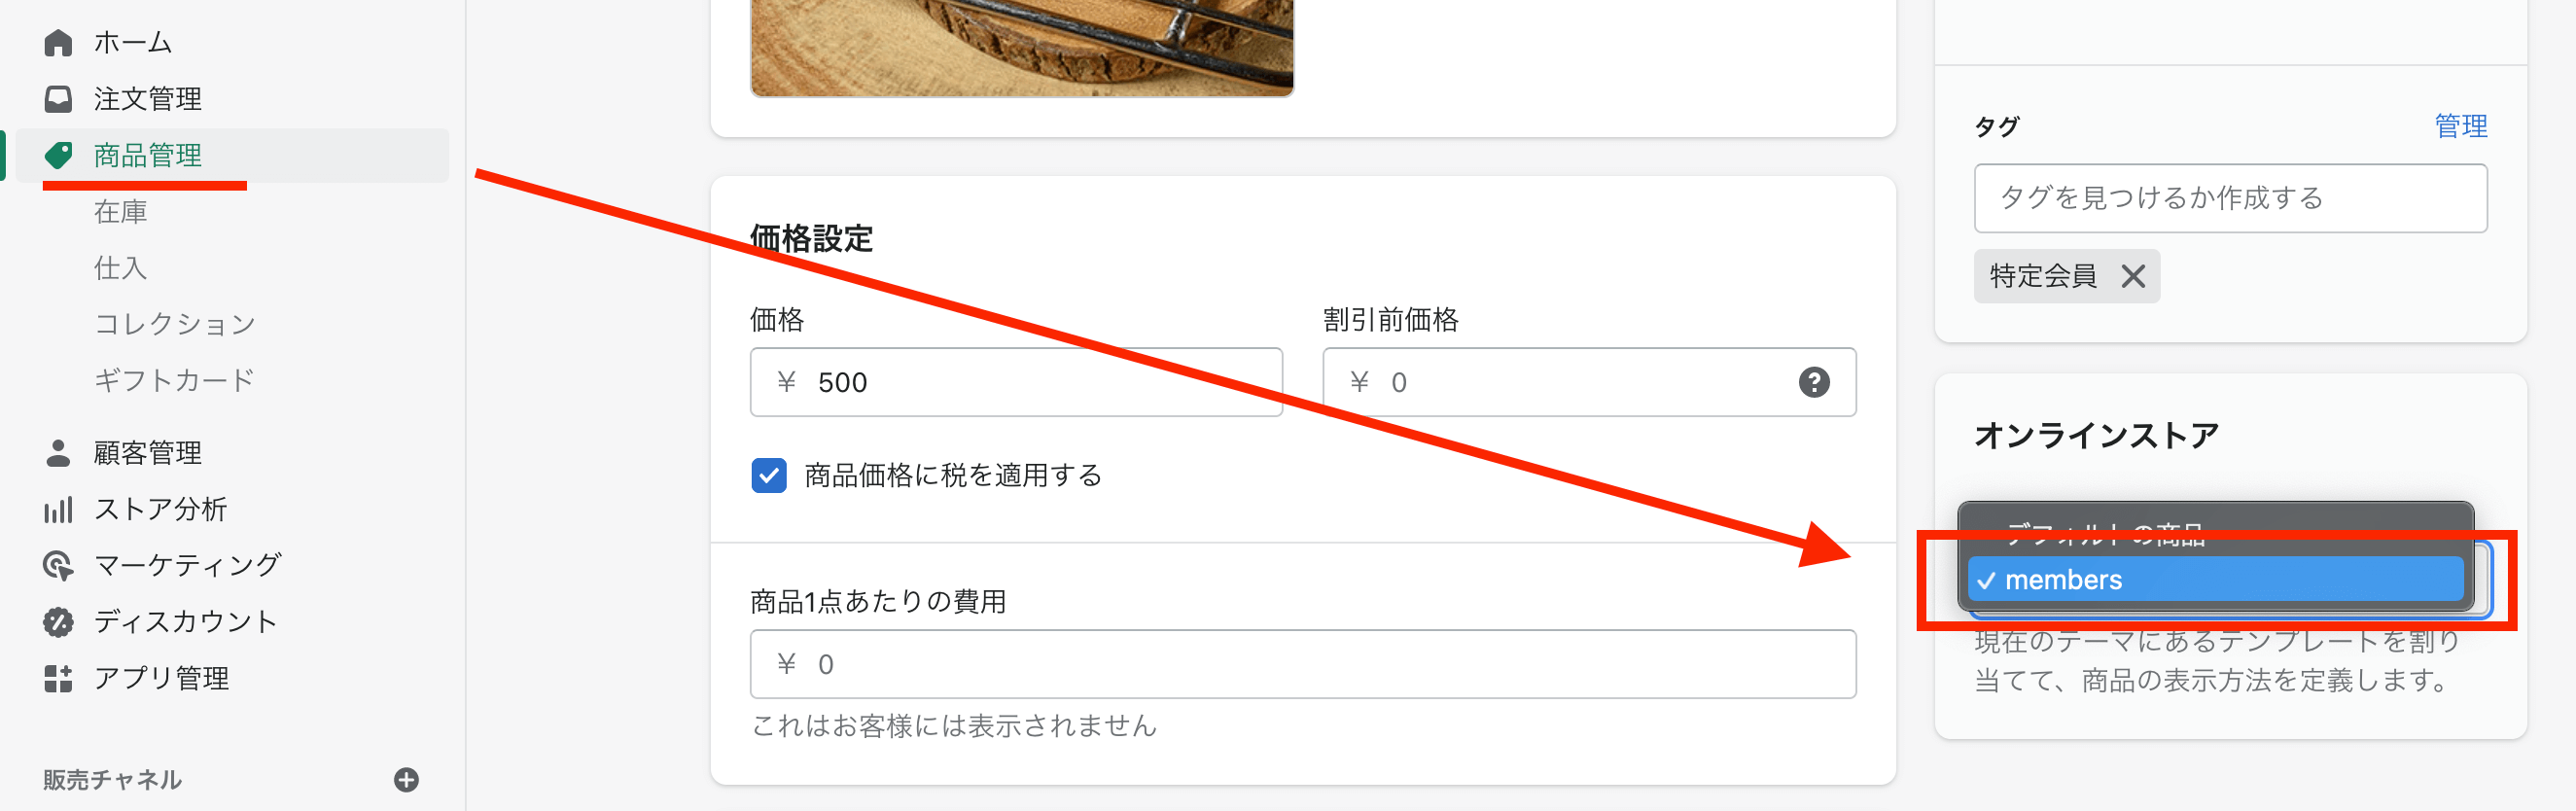
『members』というテンプレートは、先に作成した『product.members.json』のことです。
特定会員のみアクセスできるコレクションの作成
特定会員のみアクセスできるコレクションページを作っていきます。
Templatesの作成
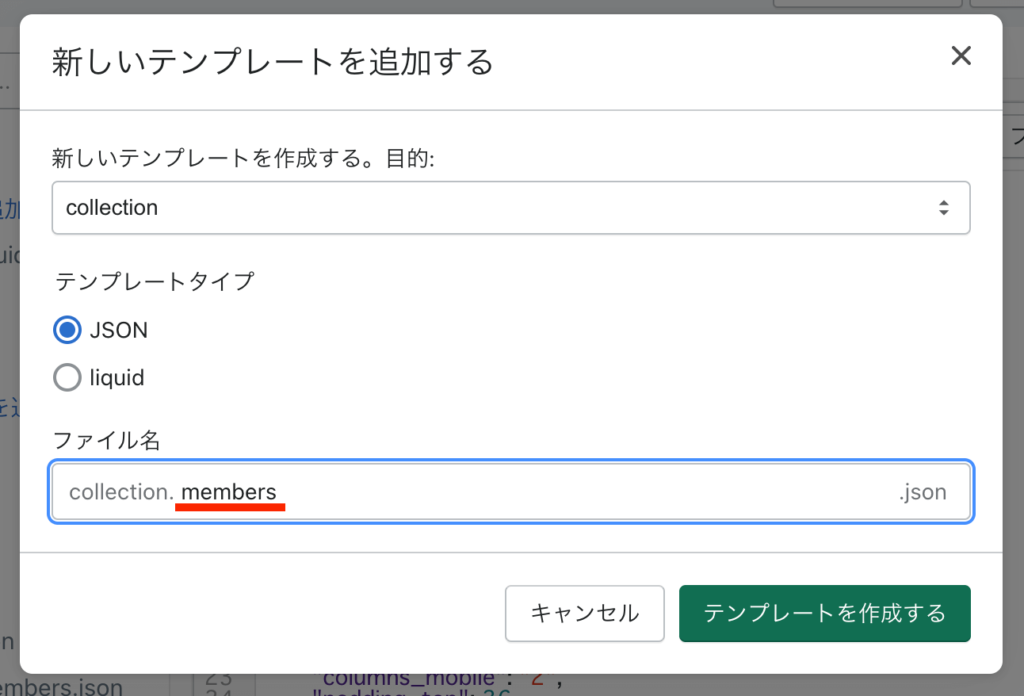
コードの編集>Templates>新しいtemplateを追加する
『collection.members.json』という名前にします。
コレクションの作成
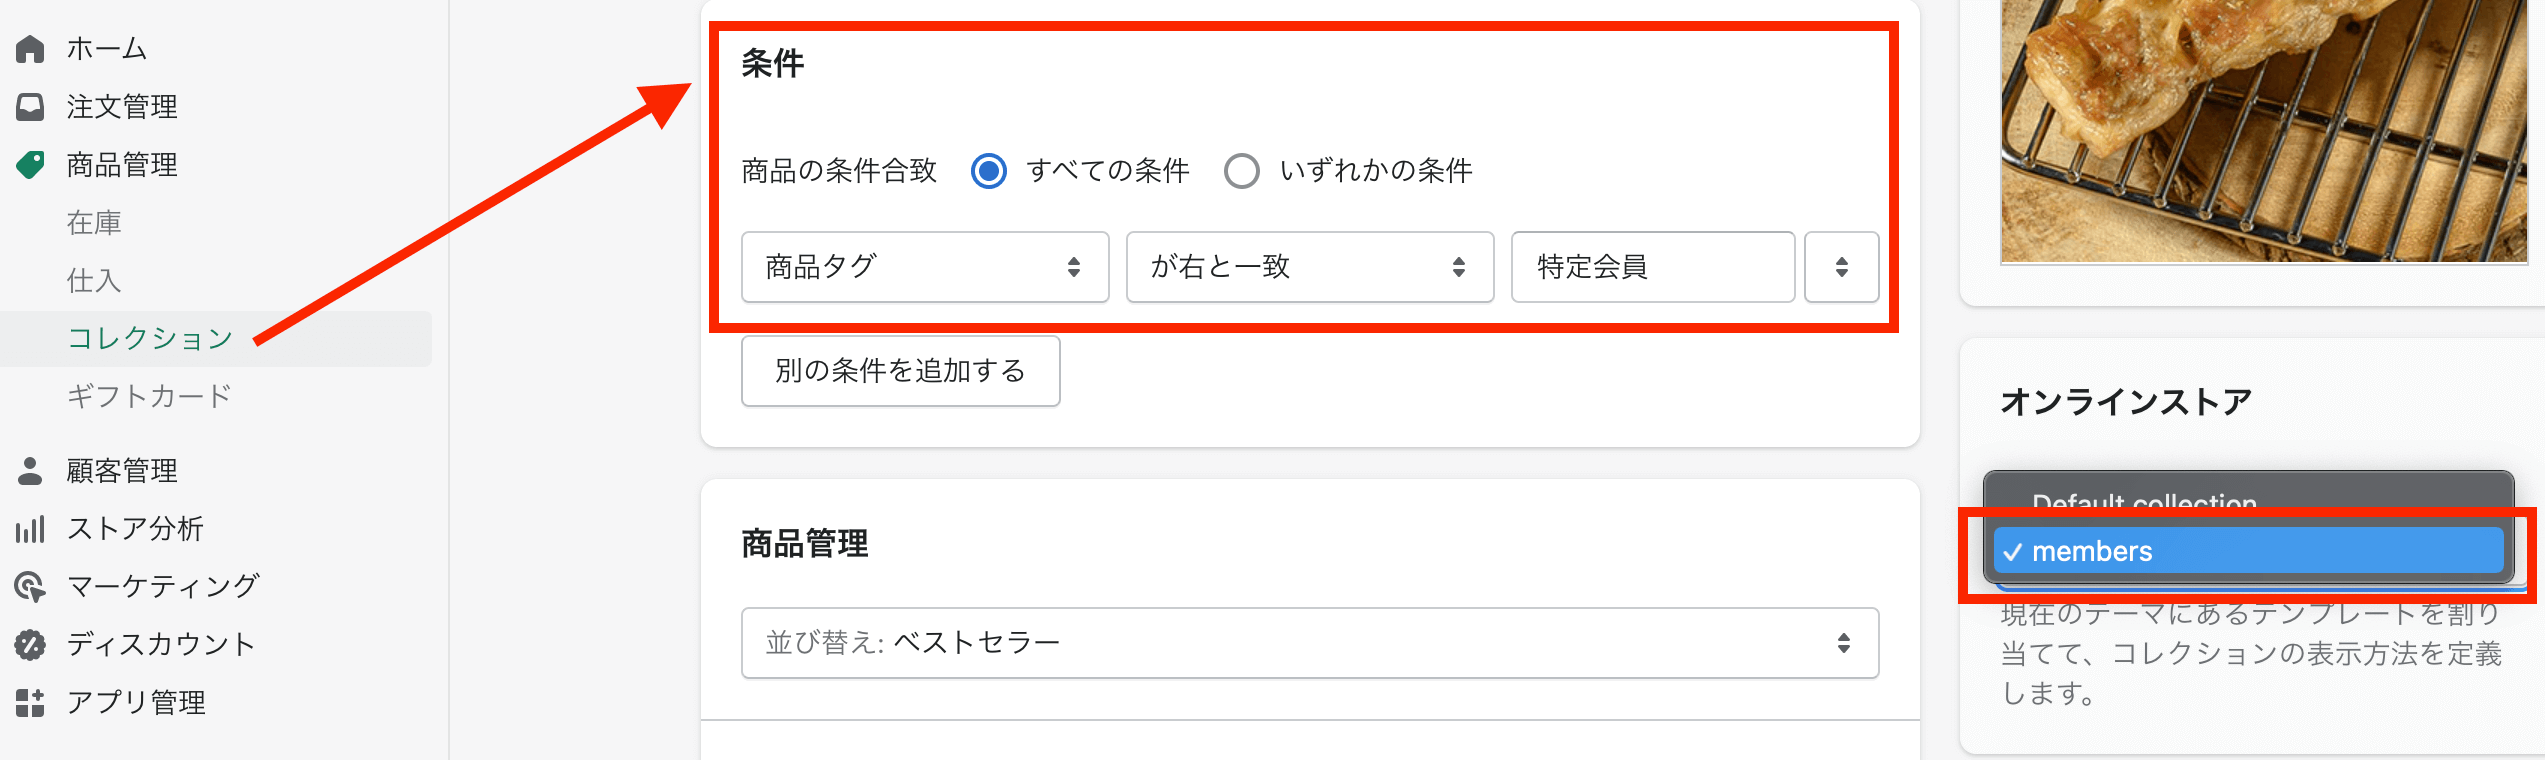
『会員専用ページ』という名前のコレクションを作ります。
コレクションの条件に「商品タグ」が「特定会員」というタグが付与されている商品のみ表示されるようにします。
テンプレートは『members』に変更します。
メニューに特定会員ページを設定する
メニューに特定会員のみアクセスできるコレクションページのリンク『会員専用コレクション』を追加します。
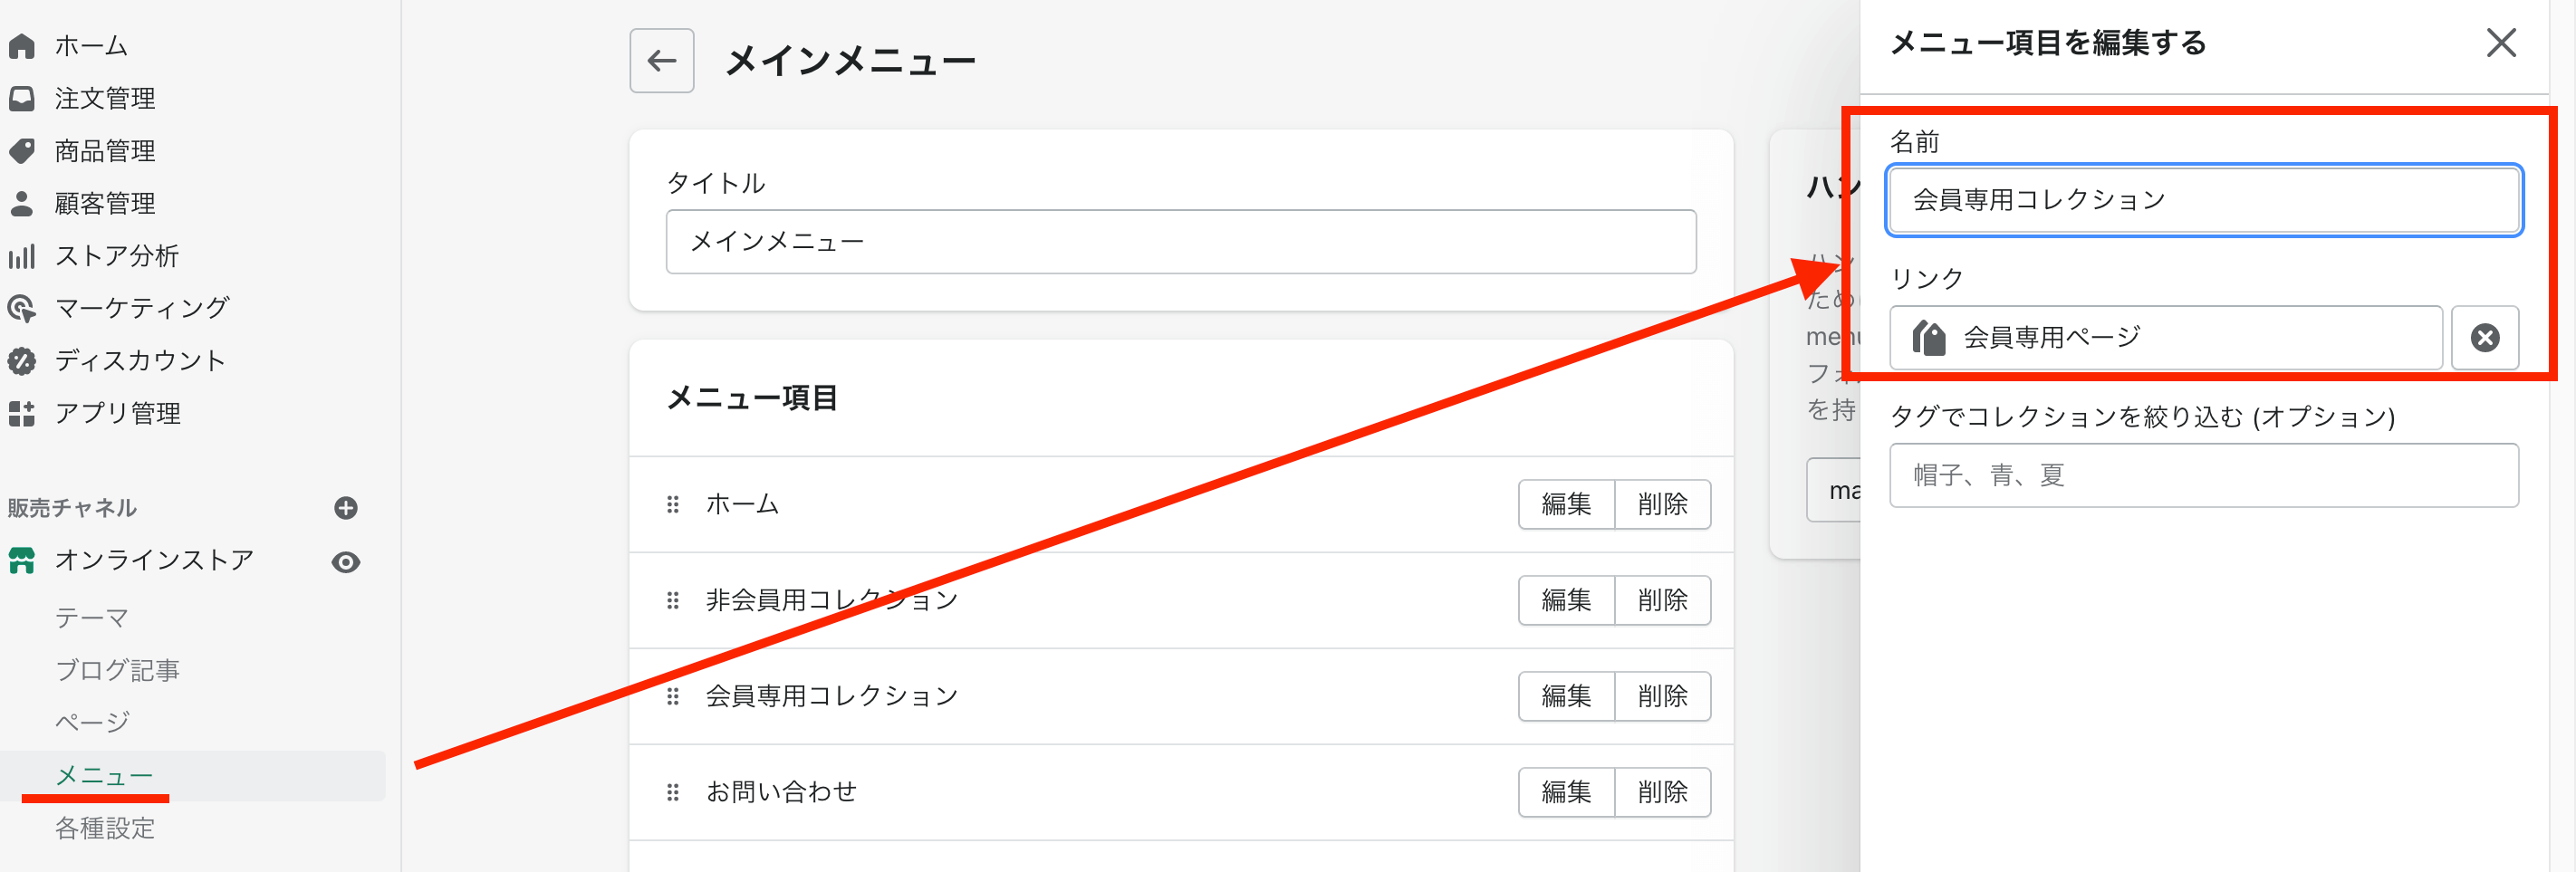
コレクション名・リンクは任意で名前をつけてください。
特定会員以外がアクセスした場合に表示されるページの作成

特定会員以外が、特定会員の専用ページにアクセスしようとした時に表示されるページを作ります。
Snippetsの作成
コードの編集>Snippets>新しいsnippetを追加する
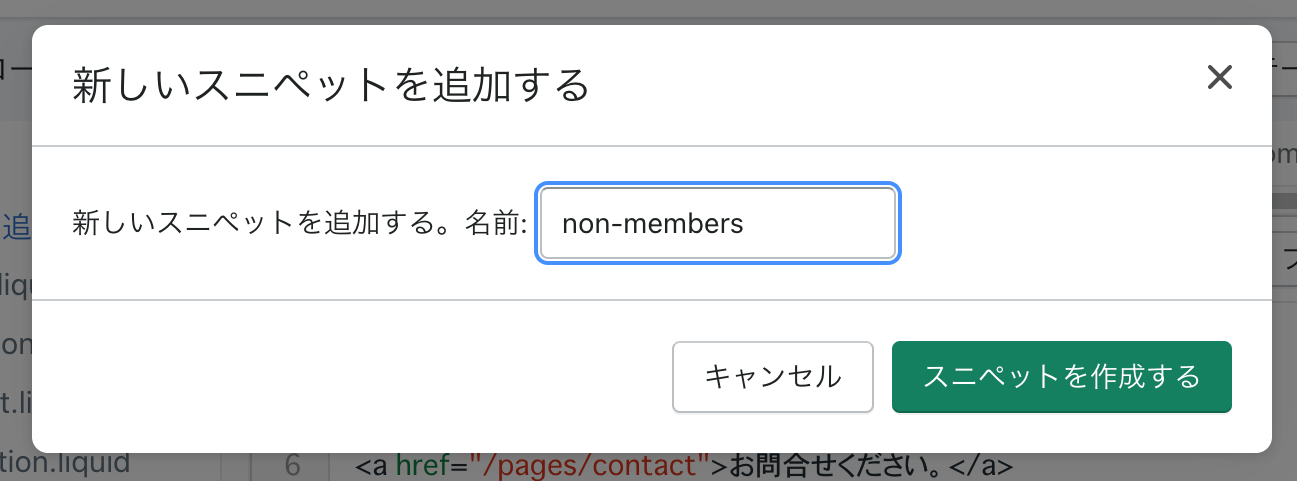
『non-members.liquid』というスニペットファイルをつくり、
コードを追加します。
<h1>このページは会員専用のページです</h1>
<p>
  {% unless customer %}
    <a href="/account/login">ログインする</a> |
  {% endunless %}
    <a href="/pages/contact">お問合せください</a>
</p>
{% unless customer %}→会員でない場合(非会員)には、『ログインする』と『お問い合わせください』というリンクを表示し、
アカウント登録しており、なおかつログインしている場合、『ログインする』は表示されません。
特定会員だけがアクセスできるページの表示
最後に、特定会員だけがアクセスできるページの設定をしていきます。
theme.liquidの編集
Layoutにある『theme.liquid』内の、
<main id="MainContent" class="content-for-layout focus-none" role="main" tabindex="-1">mainタグの直下にコードを追加します。
{% if template contains 'members' %}
  {% if customer.tags contains 'members_0327' %}
    {{ content_for_layout }}
  {% else %}
    {% render 'non-members' %}
  {% endif %}
{% else %}
  {{ content_for_layout }}
{% endif %}
「members」という名前を含むテンプレートにアクセスした場合、
{% if customer.tags contains 'members_0327' %}『members_0327』のタグを持っていない顧客には、
{% render 'non-members' %}「non-members」というsnippetで作成したコードを表示。
「members」を含むテンプレート以外は、どの訪問者でも見られるようするといった内容です。
まとめ

設定できましたか?基本的にはどのテーマでも設定できると思います。もし正しく表示されない場合はいま一度設定もれがないか確認してみてください。
・membersの名前を含むテンプレートページは、『members_0327』というタグを持つ会員しかアクセスすることができません
・それ以外の会員と非会員は、別ページにリダイレクトされます
以上です。
少しでもこの記事が参考になれば幸いです。
本記事の中でわからないことがあればお気軽にご相談ください。